|
Can't find what you need? Request a disassembly manuals and we will try to locate it and add it to our database.
If you like this manual recomend it to your friends...
| | |
| |
| |
|
 |
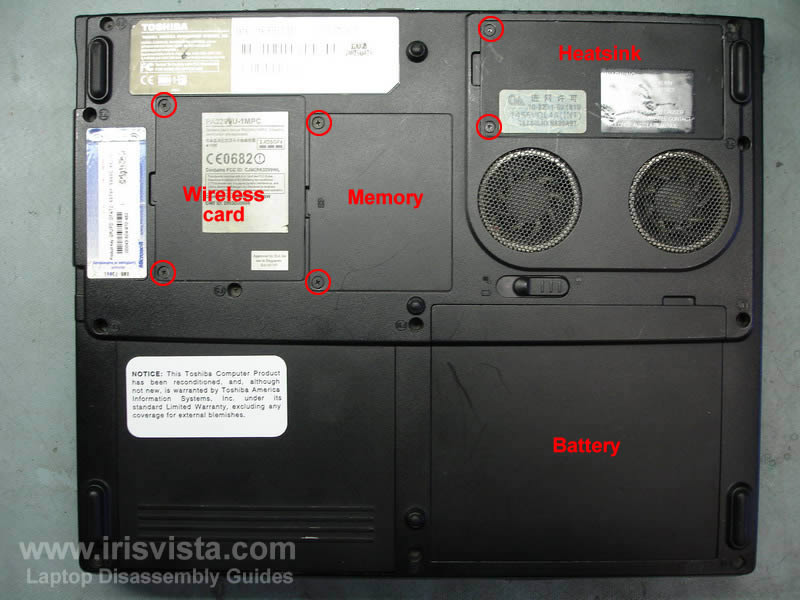
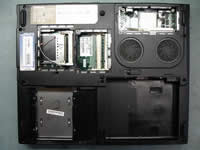
STEP 1
Remove battery.
Remove wireless card cover, memory cover and heatsink cover.
The heatsink cover is secured by two torx screws.
|
| |
|
 |
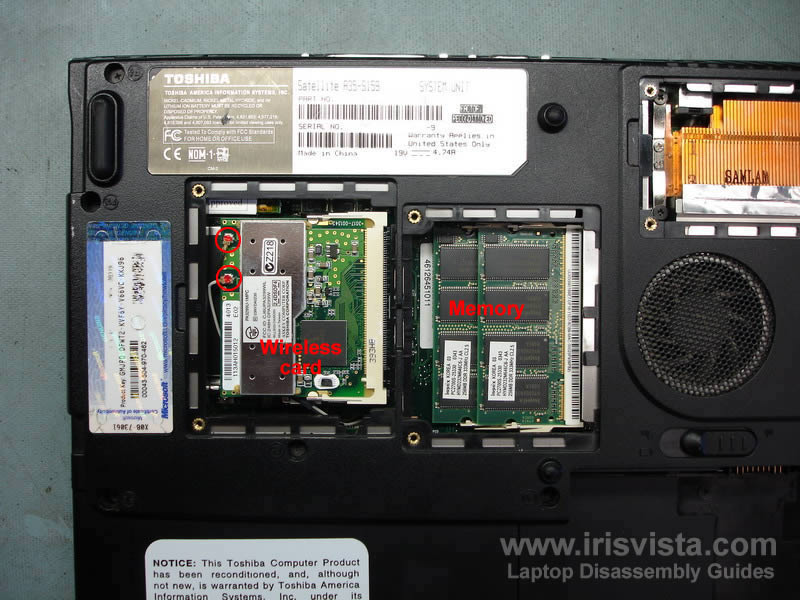
STEP 2
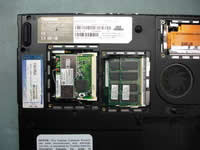
Carefully unsnap both wireless antenna cables from the wireless card using your fingers.
Spread latches on both sides of the wireless card and remove the card.
Remove both memory modules.
|
| |
|
 |
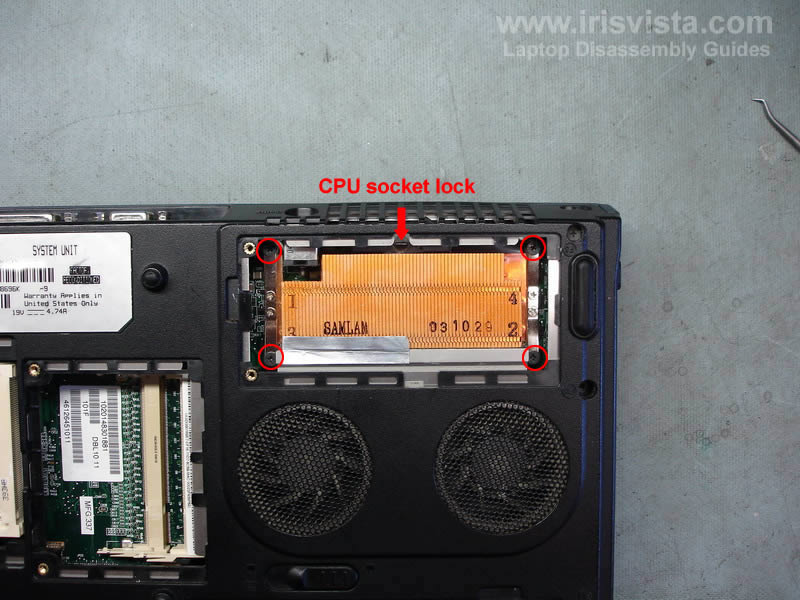
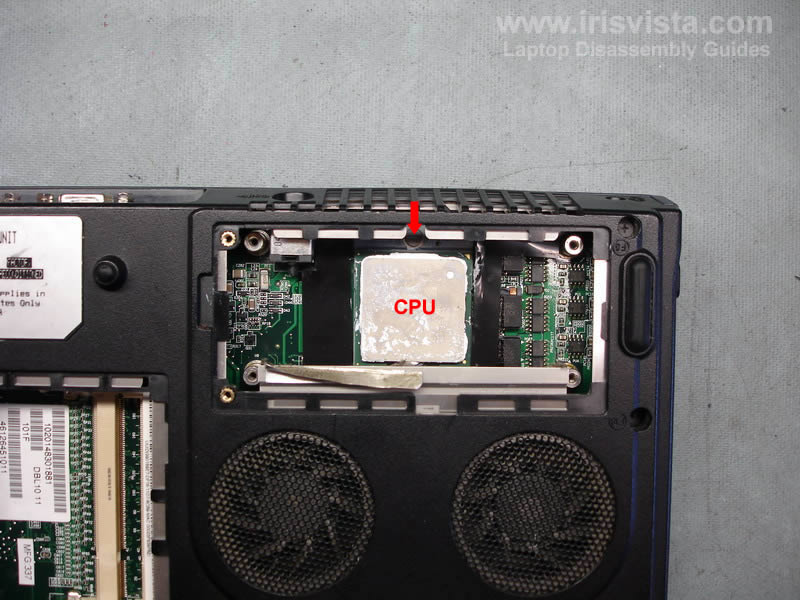
STEP 3
Remove four screws from the heatsink.
Unlock the CPU socket by turning the lock (screw) into unlocked position.
|
| |
|
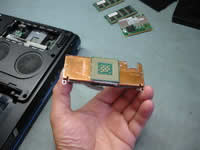 |
STEP 4
Carefully lift up and remove the heatsink.
The CPU will come out together with the heatsink.
Be carefull with the CPU pins.
|
| |
|
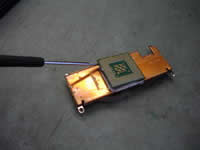 |
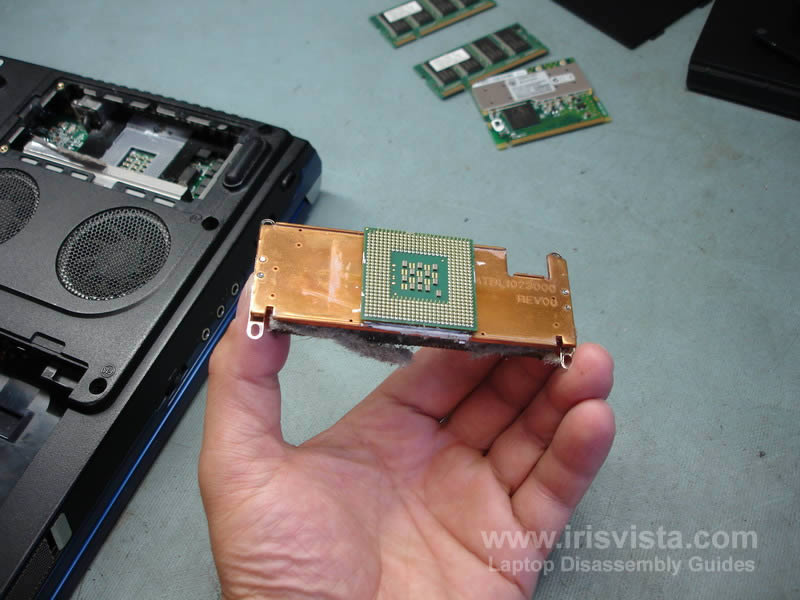
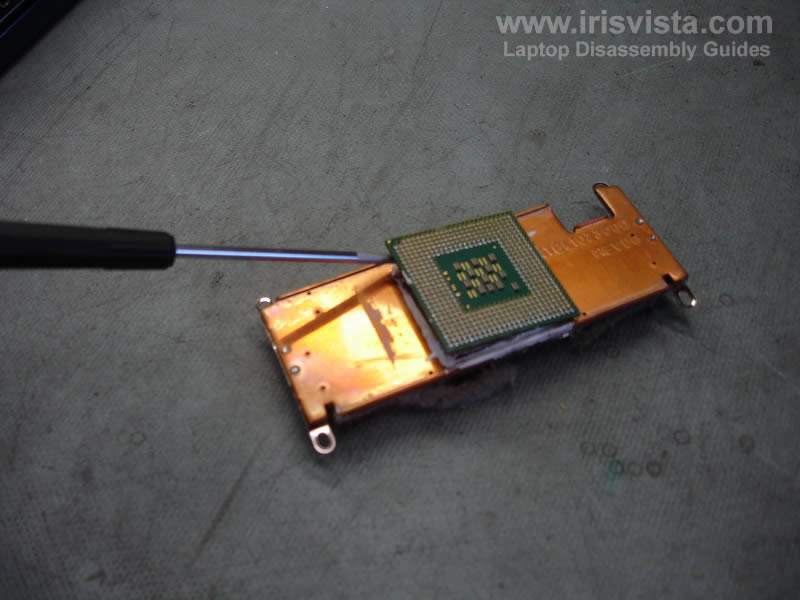
STEP 5
Now you'll have to separate the CPU from the heatsink.
Insert flathead screwdriver between the CPU and the heatsink and carefully separate the CPU.
|
| |
|
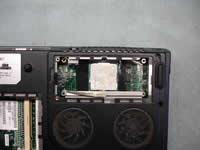 |
STEP 6
Keep the CPU inside the socket to prevent any damage.
Unlock the socket, insert the CPU back into the socket and lock it.
|
| |
|
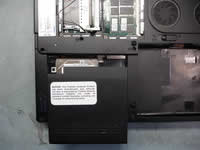 |
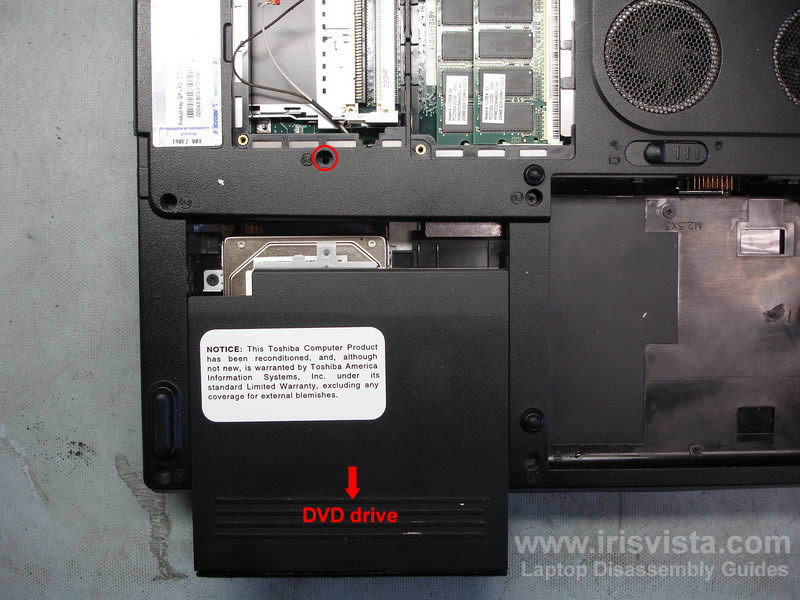
STEP 7
Remove one screw securing the DVD drive and slide the drive from the laptop.
After the DVD drive is removed you'll get an access to the hard drive.
|
|
| |
|
 |
STEP 8
Remove four screws securing the hard drive.
In order to disconnect the hard drive from the motherboard, slide it to the direction shown by the red arrow.
Lift up and remove the hard drive.
|
| |
|
 |
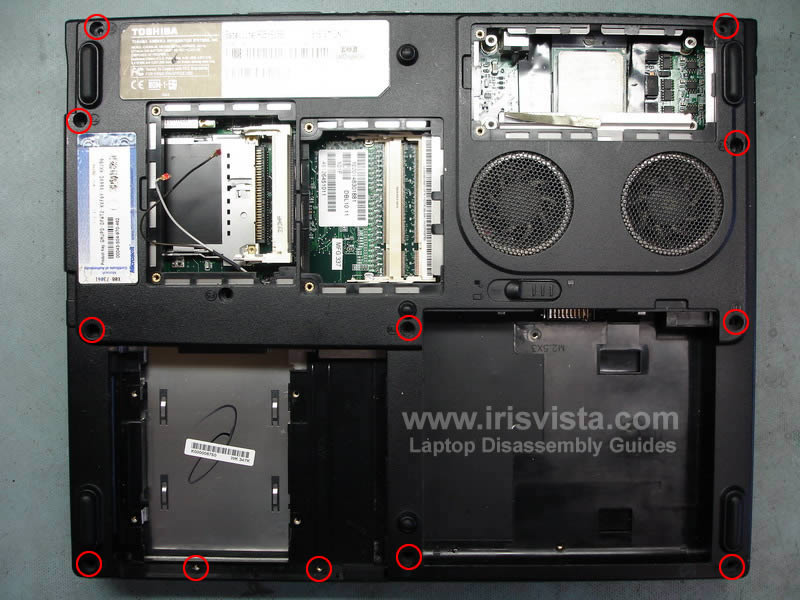
STEP 9
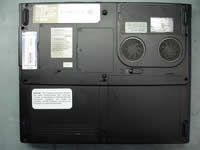
Remove all marked screws from the bottom of the laptop.
|
| |
|
 |
STEP 10
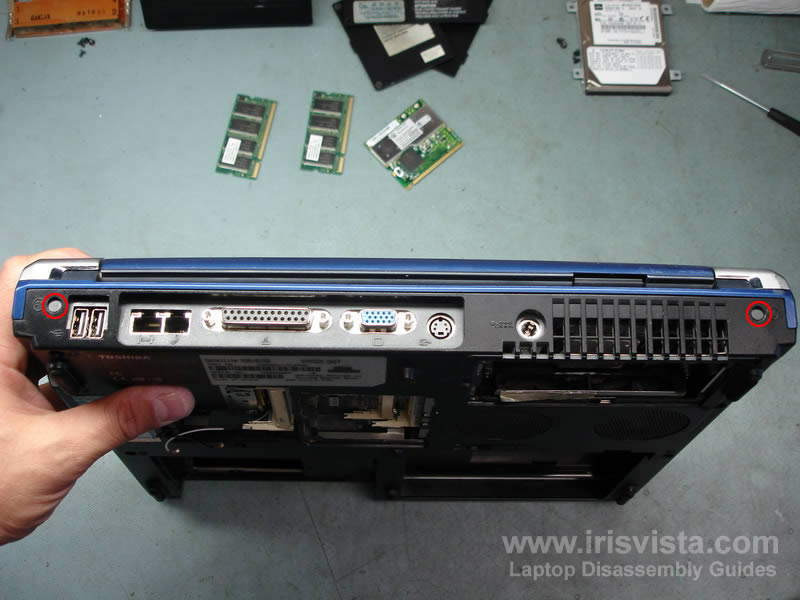
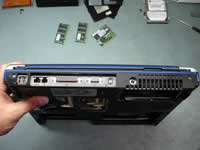
There are two more screws located on the back side of the laptop.
These screws secure the display panel hinges.
In order to remove these screws you'll have to remove sticky screws seals.
|
| |
|
 |
STEP 11
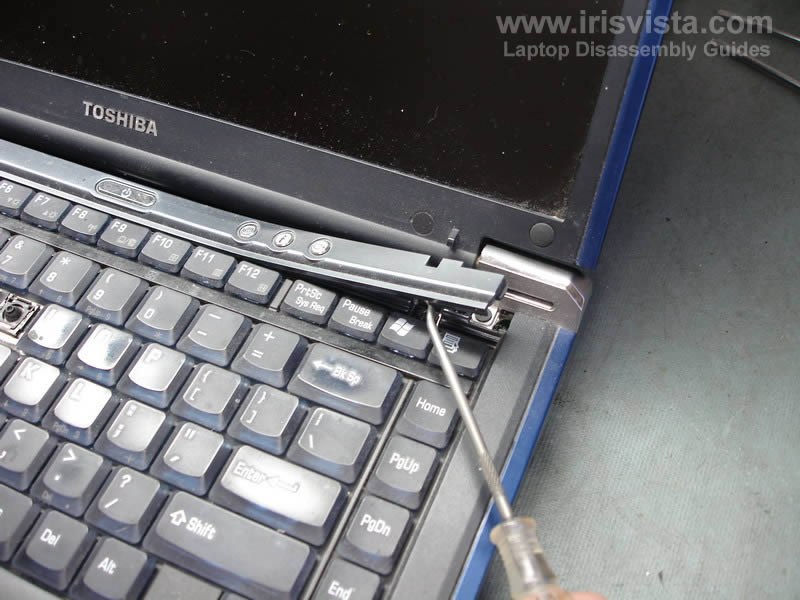
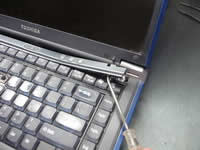
Now it's time to remove the keyboard.
Insert a small flathead screwdriver between the keyboard bezel and the keyboard and lift up the bezel.
|
| |
|
 |
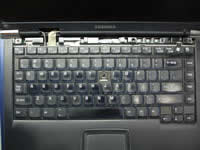
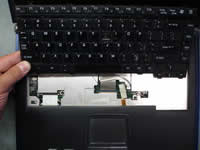
STEP 12
Carefully remove the keyboard bezel with your fingers.
|
| |
|
 |
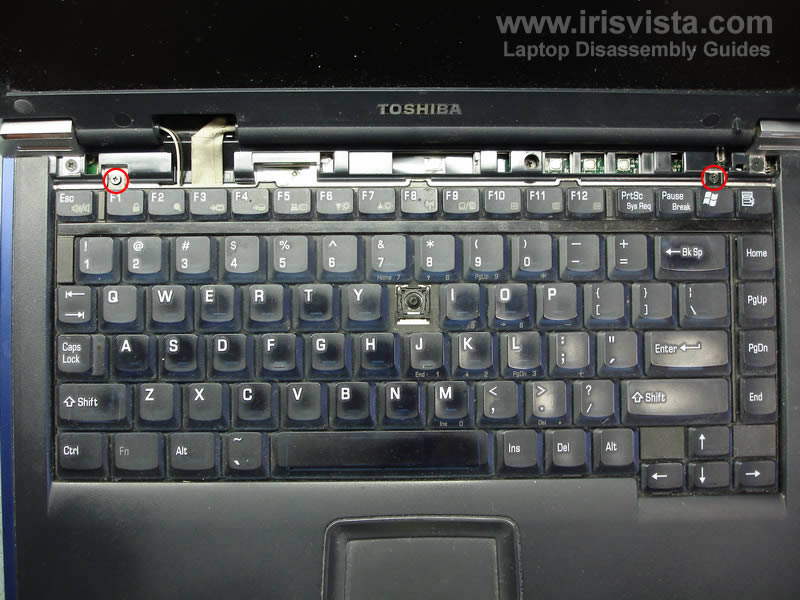
STEP 13
Remove two screws securing the keyboard.
|
 |
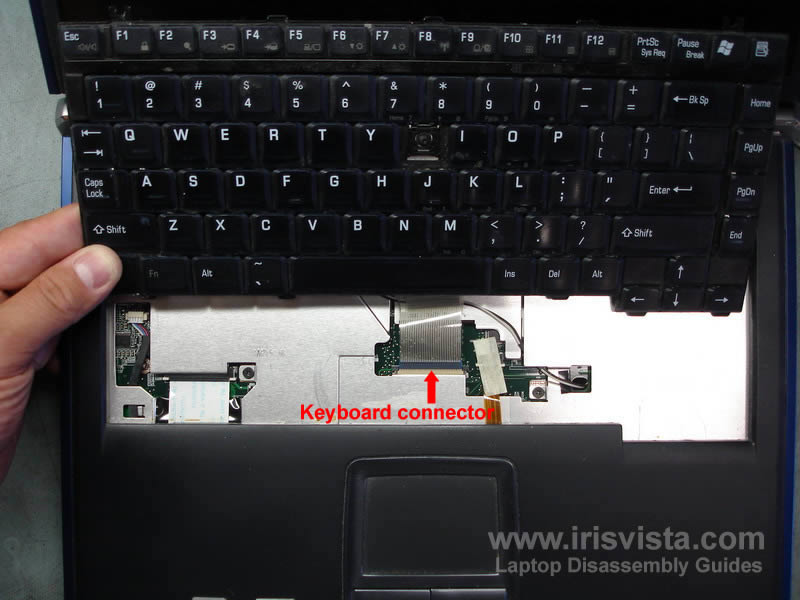
STEP 14
Carefully lift up the keyboad, it's still attached to the motherboard.
Unlock the keyboard connector and pull the ribbon cable from the connector.
Remove the keyboard.
|
|
| |
|
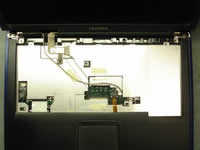 |
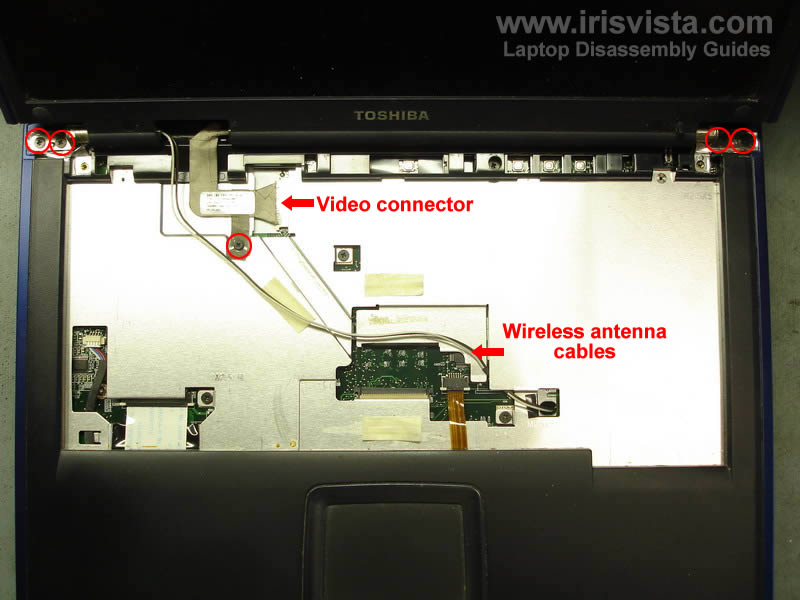
STEP 15
Disconnect the video cable from the motherboard.
Pull the wireless card antenna cables through the hole.
Remove four screws securing laptop hinges.
|
| |
|
 |
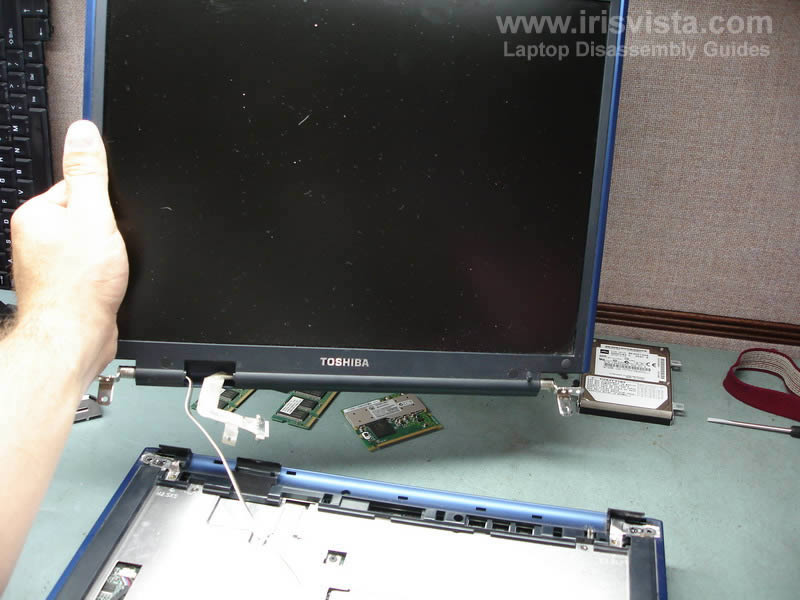
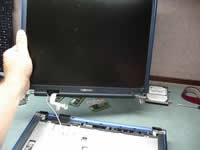
STEP 16
In order to remove the laptop display panel you'll have to close it a little bit as it shown on the picture.
Now you can lift up the display panel.
|
| |
|
 |
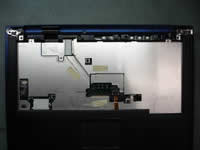
STEP 17
Remove the display panel and put it aside.
|
| |
|
 |
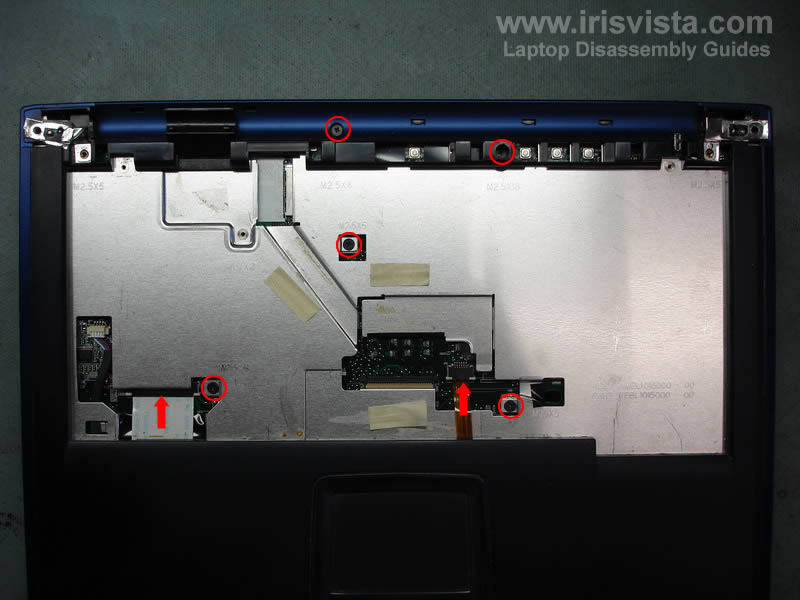
STEP 18
Unplug cables and remove screws from the top cover.
|
| |
|
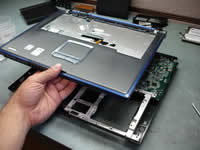 |
STEP 19
Split the laptop case and remove the top cover assembly.
|
| |
|
 |
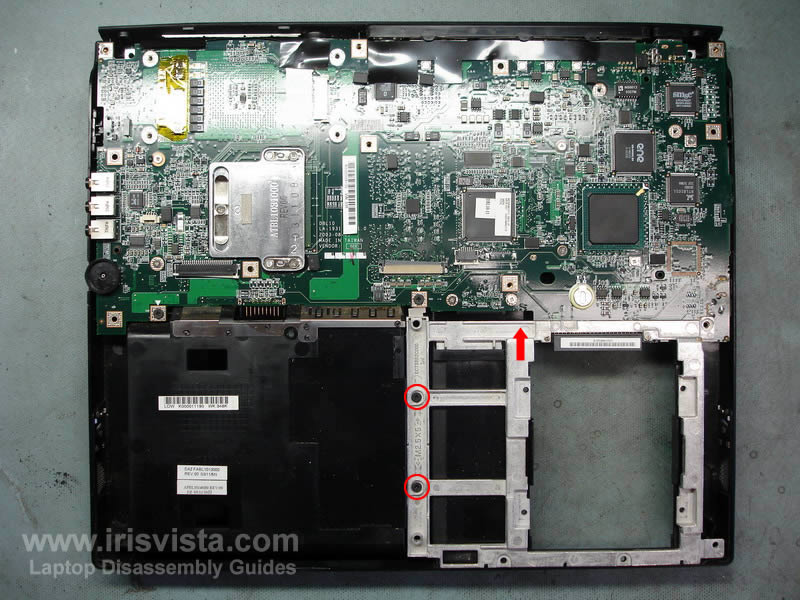
STEP 20
Remove two screws from the hard drive bracket.
Remove the bracket.
|
 |
STEP 21
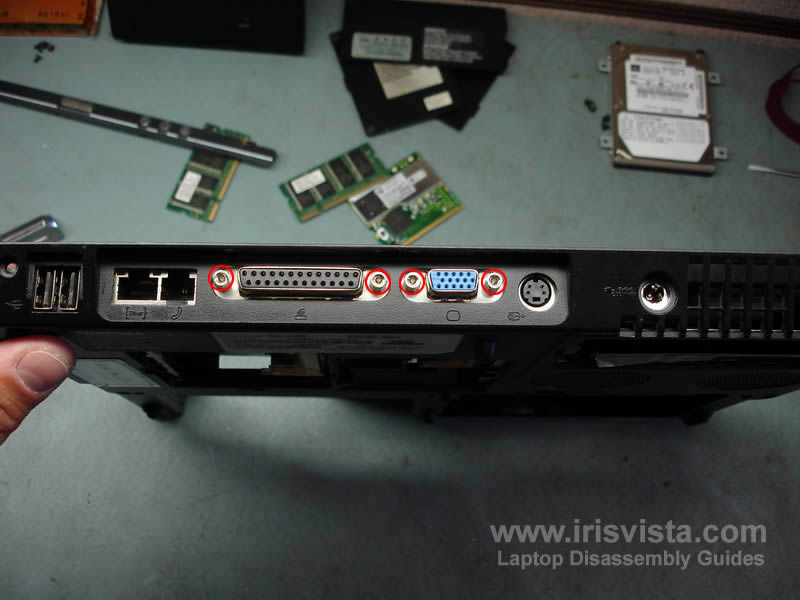
Remove four hex studs from the VGA and printer ports.
|
|
| |
|
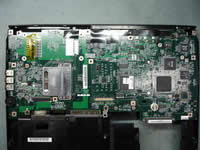 |
STEP 22
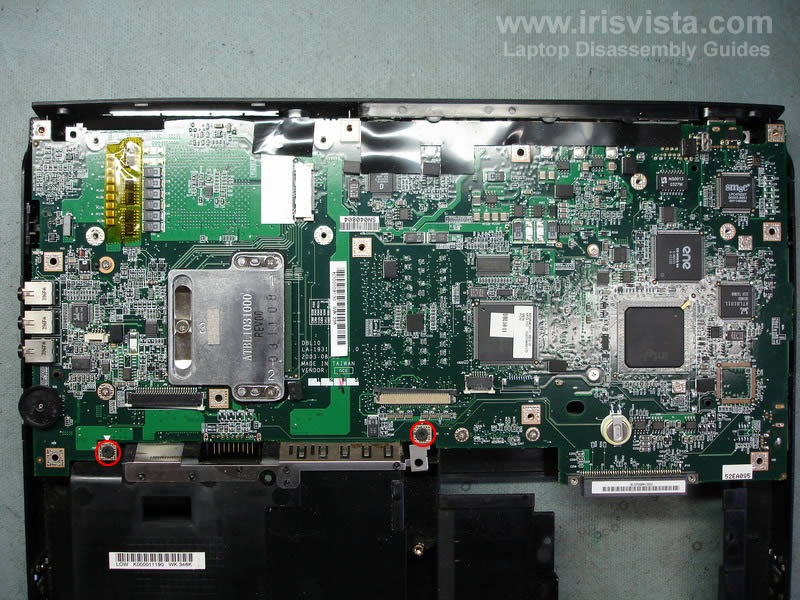
Remove two screws securing the motherboard to the laptop base.
|
| |
|
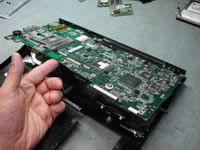 |
STEP 23
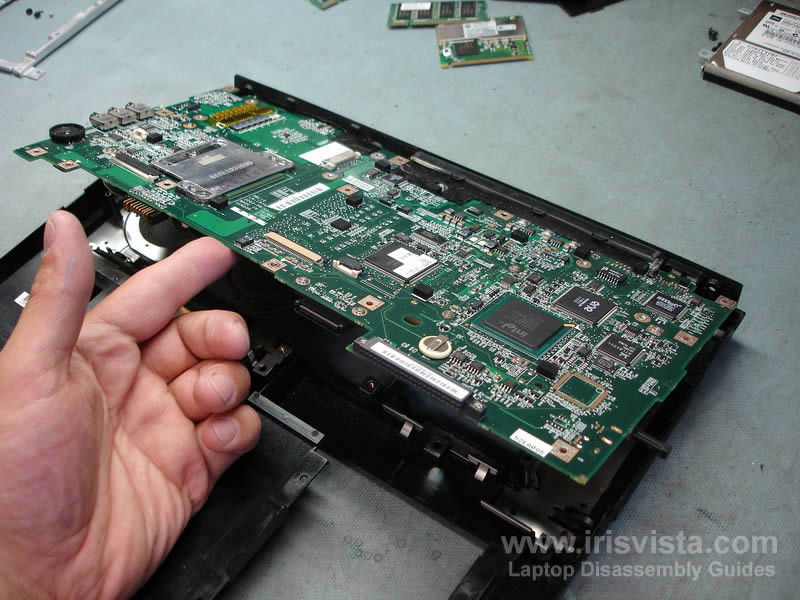
Carefully remove the motherboard from the base.
|
| |
|
 |
STEP 24
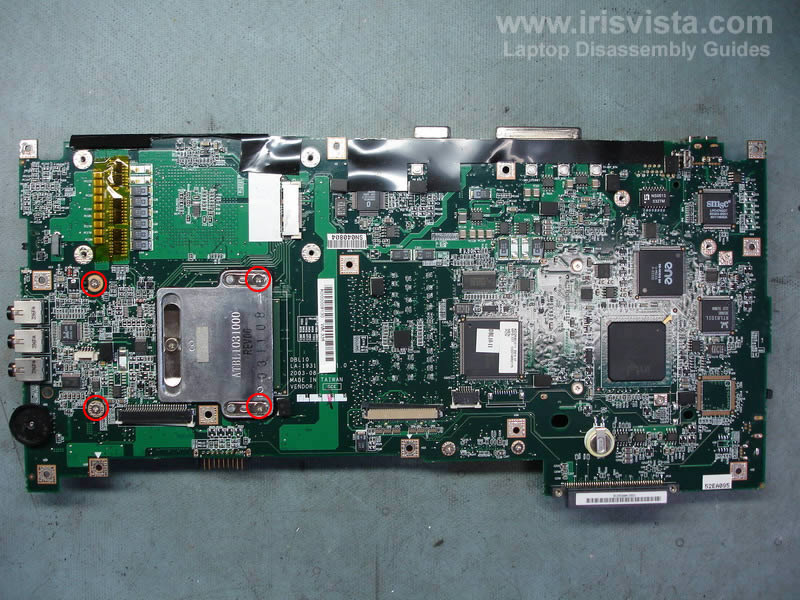
Remove four screws securing the cooling fan.
|
| |
|
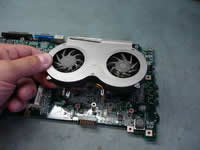 |
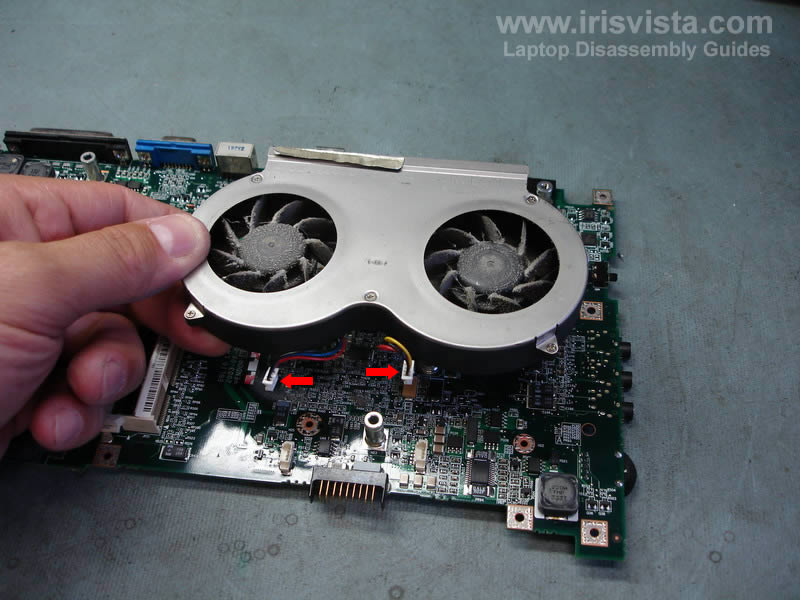
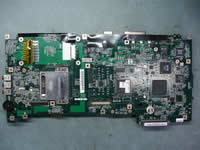
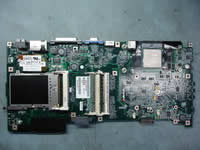
STEP 25
Turn the motherboard over.
Unplug two cooling fan connectors from the motherboard.
Remove the fan.
|
| |
|
 |
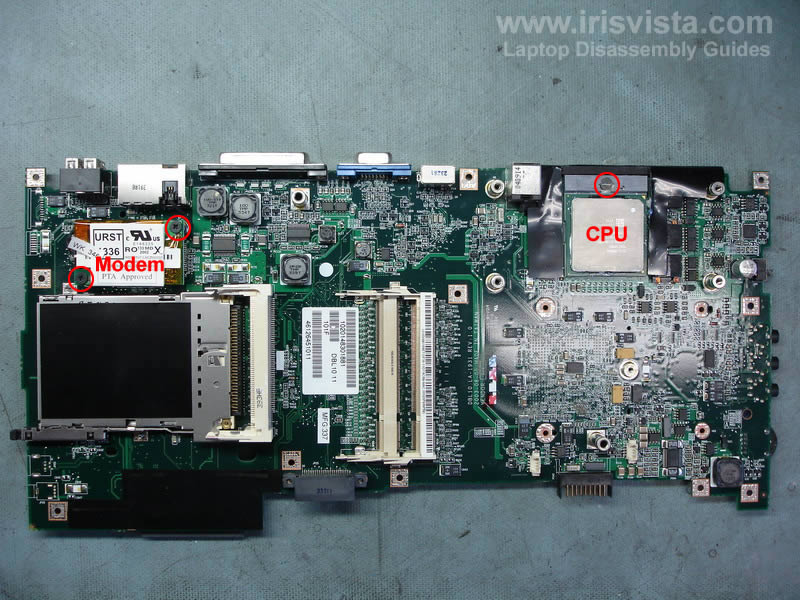
STEP 26
Remove two screws from the modem card.
Lift up the modem to disconnect it from the motherboard.
Unplug the cable from the side of the modem.
Unlock the CPU socket and remove the CPU.
|
|
| |
If you like this manual recomend it to your friends...
Search for Disassembly manuals
PinoutMaster team 2005 - 2024
Service manuals -
Car Audio Unlock-
Elemetnt Datasheets-
|